
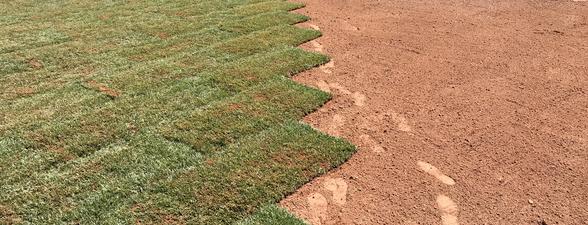
The priorities are speed, tight soil contact, and immediate moisture. Work in sections so newly laid sod is watered while the rest of the crew keeps installing.
1. Start at a straight edge
Begin along the longest straight boundary. Lay the first row carefully because every later seam follows it.
- Keep the green side up and soil side flat
- Avoid stretching the roll
- Push edges together without overlapping
- Use whole pieces where practical
2. Stagger the seams
Start alternate rows with a half piece so short seams do not line up. A brick-like pattern reduces long channels and helps pieces knit together.
- Use a sharp sod knife for clean cuts
- Fit curves and irrigation heads without thin slivers
- Keep scraps moist and use them promptly
- Avoid walking on prepared soil ahead of the row
3. Protect root-to-soil contact
Sod should sit flat on the prepared surface without pockets, curled corners, or dry gaps. Light rolling may help where appropriate, but do not compact a wet site.
- Correct bumps before covering them
- Press edges and corners into contact
- Use boards to spread foot traffic
- Keep soil off the grass blades
4. Water during the work
Begin watering completed sections instead of waiting until the entire yard is finished. The goal is to keep the sod and underlying soil evenly moist through establishment without creating runoff or standing water.
- Have irrigation tested before arrival
- Use a hose if the system cannot reach a new section yet
- Pay extra attention to exposed edges and slopes
- Adjust for weather, soil, shade, and system output
5. Inspect before the crew leaves
- Check seams, edges, corners, sprinkler heads, slopes, and hardscape transitions.
- Confirm that every section received water.
- Remove scraps, twine, pallets, and soil from hard surfaces.
- Record the variety and installation date for future care questions.
These guides offer educational context, not a diagnosis or a one-size-fits-all schedule. Confirm the grass, season, soil, irrigation, product label, and local watering requirements for the actual property.